
The following unit is intended for a high school level Spanish 1 class that implements TPRS (Teaching Proficiency through Reading and Storytelling) teaching strategies. This unit of study investigates the history and the culture of the Pueblo communities and how their interactions with the Spanish settlers lead to the Pueblo Revolt and an eventual return of the Spanish. Located in present day New Mexico, the Pueblo communities have created unique pottery pieces for centuries. This unit will investigate the pottery art form and artwork designs through several centuries in the target language. It will then culminate with students creating their own modern pottery piece infusing techniques and designs they learned about throughout the unit. To allow students to develop and practice language skills, they will work in pairs to create a video of themselves creating the piece in Spanish.
The story of Cristopher Columbus’s arrival in the Americas is one that we recount much from the perspective of the Europeans. We do not often consider how much of an impact the Spanish and other Europeans had on the indigenous peoples who inhabited this land prior to their arrival. On Columbus Day, 2012, President Barack Obama released his Presidential Proclamation which stated, “When the explorers laid anchor in the Bahamas, they met indigenous peoples who had inhabited the Western hemisphere for millennia. As we reflect on the tragic burdens tribal communities bore in the years that followed, let us commemorate the many contributions they have made to the American experience, and let us continue to strengthen the ties that bind us today.” (Obama, 2012) What are the “tragic burdens” that the indigenous have had dealt with since the arrival of Columbus, and have non-native Americans strengthened their bonds with their fellow Native Americas? In an effort to look at how Native Americans have been affected, and to create a better appreciation of their culture, this unit will briefly investigate the history of the Pueblo people of New Mexico, the Spanish settling in their territories, the Pueblo Revolt of 1680, and an in-depth investigation of their unique ceramic artwork. Due to resources in Spanish being too advanced for a level 1 Spanish class, this first week of materials will be presented in English so that students can gain a better understanding of the history of the Pueblo people. The Pueblo Revolt of 1680 is a historical event that is not typically taught in an American History course. In 1598, the Spanish settled and colonized in the area of the Pueblo peoples. The Pueblo were forced to pay tribute to the Spanish and the Spanish suppressed their religion and culture. In 1680, a Pueblo leader named Popé from the Taos Pueblo organized the different Pueblo villages and revolted and expelled the Spanish colonists. Ten years later, the Spanish would return and colonize the area again, but the Pueblo Revolt is known as one of the only successful Native American revolts against European colonists. After introducing and understanding the culture and history of the Pueblo people, the unit will transition to focus on their traditional and modern ceramic artwork. The students will be trained in how to analyze the object and respond to questions in Spanish about the object being considered. Students will describe aspects of the pottery such as its color, size and shape, its function, and its design in the target language. After analyzing and describing ten objects that span several centuries of Pueblo pottery, students will learn how to describe the steps in Spanish to create and decorate a clay pot. Students will then apply the language skills they have learned, working in pairs, to create a script in Spanish that they will use to explain how to create their own pottery piece. This script will be the students’ guide while they are creating their own piece of pottery and filming the steps and explanation in Spanish. Students will be given three days to make their own painted pottery which should include inspiration from Pueblo-made ceramics. Students will need to write a description of how they made it, what it can be used for, and why it includes certain elements in Spanish. This unit is intended for a Spanish 1 class where students have been prepared to read, write, speak, and comprehend at least 200 basic Spanish words and understand how to comprehend simple questions from the teacher and be able to turn around those questions and respond to them in Spanish. The majority of materials for the classes will be presented in the Spanish language and activities will rely heavily on Spanish language. To include technology and have students perform speaking and listening in the target language, students will create videos of themselves creating their pieces while describing the steps they are taking in the target language. If the class lacks such technology, students could showcase their work in a museum exhibit activity. This unit is intended for a Spanish 1 class. This unit can be taught in the late winter or early spring after students have learned a great deal of the Spanish language and can start to apply it to a specific theme. Students may need access to an art room and supplies with an optional kiln where pottery can be hardened. The objectives of the unit will include the following:Rationale
Objectives
In order to have students better understand the history of the Pueblo people, the teacher will use videos and readings to introduce the history of the Pueblo people. Due of the lack of video/written resources in Spanish that would be comprehensible to students in a Spanish 1 class, the first week of lessons will be completed in English. Students will analyze pictures, videos, and texts to gain a better understanding of the Pueblo people, their culture, and how the Spanish settlers began to greatly impact them in the 16th century. After students have gained background knowledge of the Pueblo people, their history with the Spanish, and the importance of ceramics and nature within their culture, the class will make a shift to analyzing pottery in the target language. In my Spanish 1 classroom, I have applied TPRS (Teaching Proficiency through Reading and Storytelling) strategies in an 85% immersion classroom to help build the students listening, speaking, reading, and writing abilities. The main techniques I employ are teaching key vocabulary and grammar techniques through question and answering techniques that revolve around presenting pictures and videos. The teacher leads the class in writing as much as possible about the picture or video eventually giving students the ability to write and tell a story in Spanish. For each unit I develop fifteen questions with fifteen sentence starters to aid students in answering these leading questions that are asked throughout the unit. I post key vocabulary, question words, and sentence starters in both English and Spanish as a visual aid to assist students in formulating in Spanish to describe the picture. I then show a series of pictures of people and objects and as a class ask them key questions from the unit about the pictures in Spanish. Students then answer the questions in Spanish, describing the picture or what the people are doing and as a class write down the sentences to create a story about the pictures. This allows the students to use all four language domains throughout the class. The teacher will present several works of art and pottery that the students will analyze as classes and answer eleven questions about each piece in the Spanish language. The teacher will model this by presenting several pieces and describe how it was made, why it was made, what important information is on the piece, etc. Students will then be shown important objects and the teacher will ask verbal questions about the piece and students will describe the piece in verbal and written Spanish. The teacher will also have several vocabulary words listed in both Spanish and English to aid students describing the object in the target language. Categories of vocabulary words include colors, materials used to create the piece, methods of creating it, types of objects, and common symbols embedded in artwork and their meaning in Spanish. A suggested list of adjectives, verbs, and nouns associated with pottery can be found here: www.dinoclay.com/mdpw/MDPW_English_French_Spanish.pdf Finally, students will be given the opportunity to make their own pottery piece and paint it, incorporating Pueblo cultural symbols. During the process, they will need to make several short videos describing how they are making the piece, what materials they are using, and why they incorporated certain symbols. Students will need access to cameras or can make short videos using their smart phones. Students will then use Movie Maker to stitch the videos together, edit them, and publish one movie showing the piece they made. To include additional writing and comprehension students can include subtitles in both English and Spanish.
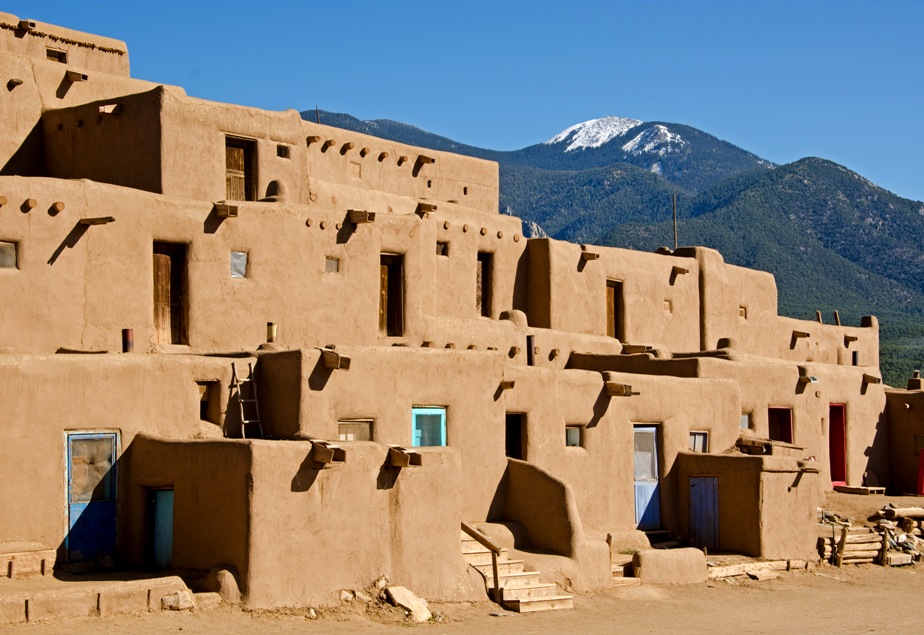
Below is a day to day lesson guide that will be followed to guide students through the knowledge needed to be able to complete their final video project in Spanish. Day 1: Objective: Students will be able to watch a short video of Native American life before the arrival of the Spanish and write a reflection describing what they have learned about Native American History in school and their reaction to this. Do now: Have students come in and write down ideas about the question: “What information do you know about Native Americans before the Europeans arrived? How did they live?” Instruction: Play episode two of the PBS series We Shall Remain to give students an idea of what Native American life was like prior to the European arrival. https://www.youtube.com/watch?v=sj8rl3lgXkA&list=PL7E86CD79FEA1D0F8&index=2 (This video is not available in Spanish.) Guided Practice: Discuss with students the following questions. Independent Practice: Read the following article and write a reflection on what you have been taught in school about Native American History. http://www.progressive.org/how-native-americans-commemorate-columbus-day (This article is in English.) Exit Slip: Write three facts you learned about Native Americans today. Write two questions you have about Native Americans. Give one opinion about what you think of the European arrival to the Americas. Day 2: Objective: Students will be able to gather information from a video about how the Pueblo people lived. Students will be able to identify important locations of Pueblo groups and geographical locations by analyzing different maps of Pueblo. Do now: Students will look at the picture of the Pueblo structures of Taos. Here is a suggested picture to use: http://everywhereonce.files.wordpress.com/2011/11/taos-pueblo.jpg. Students will then analyze and describe what type of structure they think it is, who do they think lived here, and what more information they would like to know about the structure. Instruction: Students will watch a brief video and answer identification questions about the Taos Pueblo village. https://www.youtube.com/watch?v=xW7_0ad3Aco (This video is only available in English.) Here is a list of questions to consider asking: “According to the guest, what is native culture based around? How old are the structures? What is new about the structures? How did the Pueblo people traditionally enter their homes? What is the guest’s message to the world?” After questions, discuss with students how Pueblos are independent communities that have different cultures and sometimes different languages but in general the cultures and languages are very similar. Guided Practice: Hand out a copy of the map here. (http://www.texasbeyondhistory.net/trans-p/peoples/images/map-epcf.html) David Roberts also has a similar map on page 27 of his book Pueblo Revolt: The Secret Rebellion That Drove out the Spaniards out of the Southwest. Discuss with students how the map identifies four different types of locations (Occupied Pueblos, Pueblo Ruins, Old/Modern City or Town, Post-1680 Spanish/Indian Settlement) Discuss with students their observations and how the majority of pueblo ruins were once occupied before the Spanish began to settle in 1598. Discuss with students possible reasons for the Pueblos in the southeastern section of the map being abandoned. Discuss with students the names of the pueblo ruins being Spanish. Discuss with students reasons why the name of the pueblo changed from a Pueblo name to a Spanish name. Discuss with students what happened after 1680 that the Spanish moved so far south to settle away from the Pueblo people. Independent Practice: Students will read the article summarizing the Pueblo Revolt of 1680. http://people.duke.edu/~egw4/pueblo/narrative.html Students will answer guided questions identifying why the Spanish settled in the area, how the Spanish treated the Native Americans, What key events led up to the Pueblo Revolt, and who Pope was and why he was integral to the Pueblo Revolt. Exit Slip: Write a brief paragraph of what you learned today about the Pueblo structures, the Pueblo towns, and the Pueblo Revolt of 1680. Day 3: Objective: Students will be able to identify and explain the importance of pottery in Pueblo tribes and how it is passed on from generation to generation. The students will identify the importance of nature for Pueblo peoples and how symbols of nature are represented in their artwork. Do now: Students will look at a picture of a unique piece of Pueblo pottery and write down ideas: what do you think this is used for? Why do you think the person painted a design on the piece? What materials do you think were needed to create the piece? How much time do you think it took to create this piece? Instruction: Students will watch a video of how a family in Santa Clara Pueblo passes on its practices from generation to generation. The video is available here: https://www.youtube.com/watch?v=iiIxMwz8TLA. Discuss with students the importance of passing on the traditional ways of creating pottery and incorporating the traditional symbols into the pottery that the new generations create. Guided Practice: The students will study important symbols that will be seen in the artwork we study. Symbols from Pueblo Pottery Designs by Kenneth Chapman provides several explanations of designs and symbols that are common among many Pueblo pottery pieces. Chapman shows several designs that have been incorporated into hundreds of pottery pieces. Students will be presented with several examples of symbols of leaves, plants, flowers, birds, animals, etc. Students will need to analyze these symbols and identify them under the different categories of symbols (plants, leaves, etc.) Dr. Margaret Bond of Santa Rosa Junior College also provides a brief presentation that speaks to the importance of incorporating nature and water symbols in pueblo pottery. Her presentation is located here: http://www.santarosa.edu/~mbond/PuebloSymbols.pdf . The students will complete matching activities of symbols and key vocabulary words in Spanish. Independent Practice: Students will work in groups of four. Each group will receive a sheet with four Pueblo pots with intricate designs. Students will work in groups to identify different symbols and classify them as different forms of plants, animals, geometric designs, or miscellaneous. Students will then be assigned one of the different symbols and they will describe where they identified the different symbol on the four pots. Exit Slip: Students will need to look at a pot projected on the screen and identify four different symbols that they see in the piece. Students will then need to answer the question, “How is pottery important to the Pueblo people?” Days 4-9: Objective: Students will be able to analyze ten Pueblo objects and describe each one in Spanish in ten sentences verbally and in written form. Students will begin their study of objects and describing the artwork in Spanish. To begin students will first need to be provided key vocabulary to help describe the pottery pieces that will be shown the next five days. Instead of explicitly teaching vocabulary and grammar, the teacher will use TPRS methods to ask key questions about the pottery pieces projected on the screen. Near the screen the teacher should create a list of nouns and adjectives to help students describe the objects in the target language. The categories of vocabulary will include: colors, size, shape, people who use the object, functions of the object, symbols on the object, symbols of nature, and materials used to create the object. Please see the following website for options of categories that you can use to create your own vocabulary reference posters: www.dinoclay.com/mdpw/MDPW_English_French_Spanish.pdf Students will look at two major pieces selected by the teacher each day and students will write as a group about the objects. The Teacher will guide students through describing the objects by asking students the ten guided questions and students will respond verbally to the question referencing the starter sentences posted in class if necessary and complete the sentence with the vocabulary visual aid posters that are also available. The teacher will write the 10 sentence description of the first piece as a class on the board and students will copy the description in Spanish. (See the Appendix for an example of questions and sentence starters in both Spanish and English that can be used.) The teacher will next provide a sample ten sentence description in Spanish and ask the students to translate the description into Spanish to check for comprehension. Students will then independently look at the second piece that the teacher projects and have students write about it on their own. The objects that the teacher will show are images of pieces available on the University of Pennsylvania Museum of Archeology and Anthropology website. The objects listed below are suggested and are presented in chronological order. Day 4: Pot -Unknown date http://www.penn.museum/collections/object/269649 Seed jar – 1400-1625 http://www.penn.museum/collections/object/255157 Day 5: Students will work on describing the first jar in Spanish as a class. The second one, students will work in pairs to use sentence starters in Spanish to describe the object and its design. The class will then share out ideas. Jar- 1890’s http://www.penn.museum/collections/object/276137 Jar -1890’s http://www.penn.museum/collections/object/19122 Day 6: The students will analyze the two objects below. Students will work on describing the first one in Spanish as a class. The second one, students will work in pairs to use sentence starters in Spanish to describe the object and its design. The class will then share out ideas and sentences. Bowl – 1890’s http://www.penn.museum/collections/object/348556 Bowl – 1890’s http://www.penn.museum/collections/object/13475 Day 7: The Students will compare and contrast these two objects below. Students will need to use sentence starters in Spanish to describe the similarities and differences between the design, shape, symbols, and use of the objects. Bowl – 1890’s http://www.penn.museum/collections/object/10515 Bowl – 1875: http://www.penn.museum/collections/object/233305 Day 8: Students will be shown these two objects below. Students will need to use sentence starters in Spanish to describe the similarities and differences between the design, shape, symbols, and use of the object. Pot – 1940’s: http://www.penn.museum/collections/object/427345 Bottle – 1936: http://www.penn.museum/collections/object/28218 Day 9: Students will analyze the three modern pieces below. Students will finally look at modern pottery and the images and materials that are now used to make Pueblo pottery. Students will describe the pieces and identify similarities and differences between the three pieces Bowl – 1999: http://www.penn.museum/collections/object/315972 Vessel – 2002: http://www.penn.museum/collections/object/346262 Day 10: Objective: Students will be able to analyze traditional ways of creating pottery by watching a video and rewriting steps used to create the piece. Instruction: Students will watch a video of Maria Martinez and Popovi Da of the Pueblo San Ildefonso and will analyze videos in Spanish of how to create pottery. Ask students to keep notes, and as a class, create a step by step process of how Maria and her son created the pottery. The video is available here: https://www.youtube.com/watch?v=SkUGm87DE0k . (The video is only available in English) Guided Practice: As a class, create a list of 10-12 steps Maria and her son took to create the black-on-black pottery. The Teacher will guide students through identifying how to describe the steps of how to create pottery from cutting clay, molding clay, allowing clay to harden, and finally painting designs onto the clay. Exit Slip: Complete a 3-2-1 activity. Write three things you found interesting about Maria Martinez’s process of creating pottery. Write two questions you have about the process. Write one symbol or design you saw that interested you about the pottery. Students will then retell the steps as they look at pictures of the video using the target language taught. Day 11: Objective: Students will be able to watch a video and describe the pottery making process in Spanish by describing 10 directions in Spanish. Do now: Students will watch a 3-minute Antiques Roadshow video featuring pieces by Maria Martinez. Students will reflect on the description and value of the art pieces. Discuss with students the value and importance of pottery pieces like these. A video and transcript of the video are available here: http://www.pbs.org/wgbh/roadshow/archive/200401A42.html. Instruction and Guided Practice: Students will watch a video of a man describing how to make pottery in Spanish. The video is twenty minutes and uses many of the terms that students will use to describe their own pottery making process in Spanish. The teacher will provide the students with a notes page to keep notes and the teacher will pause the video and replay important portions of the video. When the class develops and describes a step the teacher will write it out in Spanish on the board and students will copy it. The video is available here: https://www.youtube.com/watch?v=bUl0K5U41MQ. Exit Slip: Before leaving students will need to find a pair that they will be working with the following day to design a pottery piece and eventually create with clay. Day 12: Objective: Students will be able to work in pairs to create a painted on design for their pottery piece using influences of pieces they’ve seen in previous classes. Do now: Students will look at a teacher-selected pot projected in front of the class and identify different natural designs that were painted or carved into the pottery piece. Instruction: The teacher will go over the steps the students will take to create their pottery piece. The students will first draw out a design of the pot along with a painted on design. Students will be given one day to complete this. Students will next write out two portions of a script they will use while creating a video of their pottery creation. The first portion of the script will describe the steps they will take to create the pot–from mixing the clay, to painting the design, to allowing the pot to air dry. Students will be describing the steps they are taking in Spanish and film their description as they create the piece. The second portion of the script will include a description of the finished piece. Students will use the sentence starters to complete this. The teacher will go over the rubric that students will be graded on for their final project. (See the Appendix for an example grading rubric.) Guided Practice: The teacher will show a blank pot design on the Smart or Promethean Board and will draw out two lines that will represent the band around the pot. The teacher will then show the students 3-4 previous pottery pieces that they have analyzed. The teacher will ask students to think about what elements the artist incorporated into these pieces. The teacher will then go back to his pot design and will draw out a design using natural elements that have been seen in previous pieces. Independent Practice: Students will work independently to create their design that they will eventually paint the pottery pieces they create. Day 13-14: Objective: Students will be able to write out a script of what they will be saying in the target language for the two portions of the video they will be creating. Students who complete their scripts will hand them in for review by the teacher. The teacher will identify grammar and spelling errors that need to be changed prior to filming. Day 15: Objective: Students will be able to complete their revised scripts and understand how to utilize a flip camera or their own smartphone to film their creation of the pottery piece. The teacher will suggest watching YouTube tutorials on how to use video programs on the students’ cellphones or any video recording device that you have available. The teacher will also give tips for recording only portions of the pottery making process in short clips so that the several videos created can be blended together using a video editing software like iMovie or Movie Maker. (The school I am currently working in uses Flip Cams. I will use Flip Cams and give the students the option to use their cell phones.) Day 16: Objective: Students will be able to create their pottery piece and film the creation of the piece describing the steps they are taking in Spanish. In my school, students will be working in the art room and the teacher will be assisted by the art teacher to create their pottery using modern commercial clay. The clay that I will use in my project is Amaco Mexican Pottery Clay available online here: http://www.staples.com/product_847904?externalize=certona. Students will not be using major tools to make their clay pots. Instead they will be using their hands to build pinch pots. Upon forming their pinch pots, students may use a modelling stick to smooth their pot for a smoother surface to paint their design on. Students will be working in pairs. One student will need to use video recording equipment to film and speak about how they creating the piece. The teacher will distribute clay and they will follow the designs they have already planned and the scripts they have already written. The teacher will allow the pots to air dry so that tomorrow students may paint their designs onto the pots. Day 17: Students will return to the art room. Students will work in pairs to paint their pueblo inspired designs onto the artwork. Students will also record portions of their activities to be included in their videos. Day 18: This will be the last day in the art room. Students will complete the painting of their pottery and will finish the needed documentation using their cameras. Day 19-21: Objectives: Students will be able to create a video description of their completed pottery piece. Students will be able to edit their videos using a movie editor and create a final version of their video. After students have completed their filming, students will return to the classroom or will go to a computer lab where they will begin to edit their films of their pottery creations. The teacher will go over how to use a Movie Maker or iMovie software so that students can transfer their videos into the program and they can create a final video. Students will be given 3 days to complete editing their film. Student will also need to include Introductions, subtitles in both English and Spanish, and credits. Day 22-23: Objective: Students will be able to present their completed pieces and videos to the class. Students who are watching other students present will need to complete a worksheet that answers questions in Spanish about the piece they are watching be created. The questions will include: “How is the object? What symbols are there in the object? Do you like the object? Why?” Day 24: Objective: Students will complete a gallery walk activity in which they will be able to analyze their classmates’ pottery pieces and they will leave a written comment on a comment sheet about five pieces they liked. Students will walk around the room and look at the pieces that they and their peers created. Students will need to look at a minimum of five pieces and comment on five of the pieces by writing on the comment sheet next to the piece.
Pueblo/Native American Resources: 1) www.youtube.com/watch?v=sj8rl3lgXkA&list=PL7E86CD79FEA1D0F8&index=2 (This website links to the second episode of the first disc of We Shall Remain, a PBS documentary about Native Americans after the arrival of the Europeans. This episode shows a nice description of what life was like for a Native American group in Massachusetts. This video does not involve the Pueblo people. This video is in English.) 2) www.progressive.org/how-native-americans-commemorate-columbus-day (This website links to a brief article in English describing the Native American perspective of Columbus Day. It does not focus specifically on the Pueblo tribes, but Native Americans groups in general. This article is only available in English.) 3) everywhereonce.files.wordpress.com/2011/11/taos-pueblo.jpg (This website is a link to an image of a traditional Pueblo dwelling in Taos Pueblo.) 4) www.youtube.com/watch?v=xW7_0ad3Aco (This website is a link to a video interview of a Pueblo woman in the Taos Pueblo. She speaks briefly about the Pueblo dwellings and talks about Pueblo culture. This video is only available in English. 5) www.texasbeyondhistory.net/trans-p/peoples/images/map-epcf.html (This website is a link to a map of the Southwest showing where traditional and modern pueblos are located.) 6) http://people.duke.edu/~egw4/pueblo/narrative.html (This website links to an article which summarizes the Pueblo revolt of 1680.) 7) Roberts, David. Pueblo Revolt: The Secret Rebellion That Drove out the Spaniards out of the Southwest. New York, NY: Simon & Schuster. 2004. (This book provides maps, illustrations, and additional perspectives of the Pueblo Revolt.) 8) Kessel, John L. Pueblos, Spaniards, and the Kingdom of New Mexico. University of Oklahoma Press, Norman. 2008. (This book explains many of the events that led up to the Pueblo Revolt. It contains many good resources. This book is available in English.) 9) http://www.whitehouse.gov/the-press-office/2012/10/05/presidential-proclamation-columbus-day-2012 (This is a link to a 2012 presidential proclamation on Columbus Day.) Pottery Resources: 1) www.dinoclay.com/mdpw/MDPW_English_French_Spanish.pdf (This document offers a vast amount of vocabulary words available for you to use in your classroom to aid students in describing the pottery they will be using in Spanish.) 2) www.youtube.com/watch?v=iiIxMwz8TLA (This website links to a video of a Santa Clara Pueblo family describing the importance of passing on Pottery making practices from generation to generations. This video is only available in English.) 3) Chapman, Kenneth. Symbols from Pueblo Pottery Designs. (This book collects hundreds of designs found on pueblo pottery and classifies them into different categories.) 4) www.santarosa.edu/~mbond/PuebloSymbols.pdf (This website links to a presentation by Dr. Margaret Bond that explains the importance of symbols of nature in Pueblo pottery. This presentation is only available in English.) 5) www.penn.museum/collections/index.php (This website allows you to search images of objects held at the University of Pennsylvania’s Museum. All of the links of the images of Pueblo pieces found in the Day to Day Lesson section were found here.) 6) www.youtube.com/watch?v=SkUGm87DE0k (This website links to a video of Maria Martinez and her son giving a step-by-step process of how they create their black-on-black pottery pieces that have become unique to the San Ildefonso Pueblo.) 7) www.youtube.com/watch?v=bUl0K5U41MQ (This website links to video of a man giving a tutorial in Spanish on how to mix and knead clay for creating a clay pot. This video is from Columbia and is not associated with the Pueblo people.) 8) www.pbs.org/wgbh/roadshow/archive/200401A42.html (This website links to a video of an episode of the Antiques Roadshow where two pieces of pottery created by Maria Martinez are described and appraised. This video is only available in English.) 9) http://www.xtec.cat/~aromero8/pagina11.htm (This website contains an article in Spanish of how to create a clay pinch pot. It also contains helpful pictures.) 10) www.staples.com/product_847904?externalize=certona (This is a link to a ready-to-use pottery clay that would be simpler to use than creating your own clay from scratch.) 11) Wallner, Linde. An Introduction to Pottery: A Step-By-Step Project Book. Secaucus, NJ: Chartwell Books, 1990. Print. (This book provides great images of steps students will take to create their pinch pots.) Pennsylvania World Language Content Standards: Examples of visual aids displayed in class for describing pottery pieces: Spanish poster displayed in class to aid in describing how to make pottery pieces: Example Grading Rubric for final video assessment: (Three points per sentence) (Five points per specific symbol/element used.) Annotated Bibliography
Standards
Appendix
Spanish question
English Question
Spanish Starter Answer
English Starter Answer
¿Cómo es el objeto?
How is the object?
El objeto es..
The object is…
¿Qué es el objeto?
What is the object?
El objeto es..
The object is…
¿Quién usa el objeto?
Who uses the object?
_____ usa el objeto.
______ uses the object.
¿Para qué se usa el objeto?
What is the object used for?
Se usa el objecto para…
The object is used for…
¿Qué tipo de símbolos hay en el objeto?
What type of symbols are there on the object?
En el objeto, hay…
On the object, there is/are…
¿Qué significa el símbolo?
What does the symbol mean?
El simbolo significa…
The symbol means…
¿Quién hizo el objeto?
Who made the object?
_____ hizo el objeto.
____ made the object.
¿ De qué es hecho el objeto?
What is the object made of?
El objeto es hecho de…
The object is made of…
¿Cómo es similar a otros objetos?
How is it similar to other objects?
Es similar a…porque…
It’s similar to…because…
¿Cómo es diferente de otro objetos? Por qué?
How is it different from other objects?
Es diferente de…porque…
It’s different from…because…
¿A ti, te gusta el objeto? El diseño? Por qué?
Do you like the object? The design?
A mí, me gusta el objeto/el diseño porque…
I like the object/design because…
Spanish sentence starter
English sentence starter
Primero vamos a
First, we will
Segundo
Second
Tercero,
Third
Luego
Then
Después
Afterwards
Al fin…
At the end
Required in final video assessment
Possible Points
Points Earned
First portion of video: Include at least 8 sentences in Spanish describing the steps taken to create your piece of pottery. (Four points per sentence)
32
Second portion of video: Include a 10 sentence description of your video.
30
Clay pot includes at least 4 elements/symbols of Pueblo culture studied in class.
20
Video includes title, introduction, subtitles, and final credits.
18
Proper Spanish grammar and pronunciation are used.
20
Total
120